
Magento 101: How Rootstack Can Help You?
Table of contents

When it comes to ecommerce, applying the right discount strategies can significantly impact your conversion rates and brand value. So, how can you avoid the pitfalls of choosing the wrong strategy? Rootstack offers a simple guide to help you set up discount strategies effectively in Magento 2 for your ecommerce platform. By following this guide, you can attract more customers, boost sales, and improve conversion rates. Let’s get started with the basics.

Getting Started with Discount Rules in Magento 2
To begin creating discount rules for your catalog page in Magento 2, go to the Admin Panel and navigate to the left sidebar. Under the Promotions section, you can select the type of rule you want to set up.
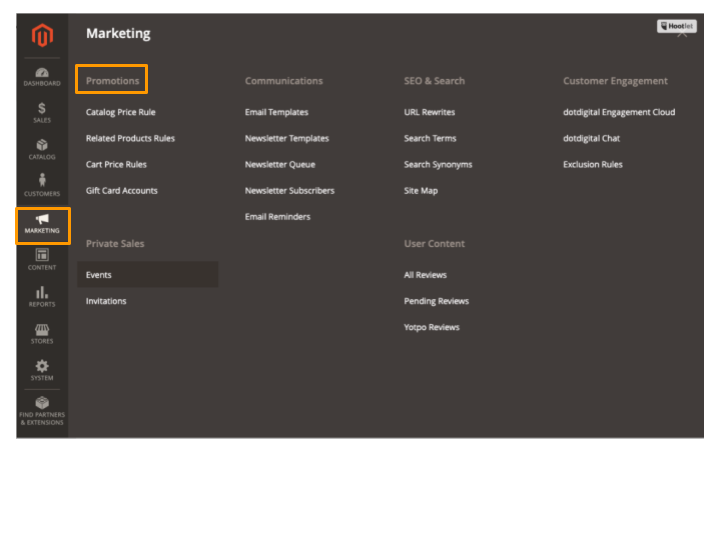
Catalog Price Rules
Magento 2 offers various pricing rules for discounts, including Catalog Price Rules and Cart Price Rules. Let's start with Catalog Price Rules, where you can define, create, or edit the conditions for your discount strategies.
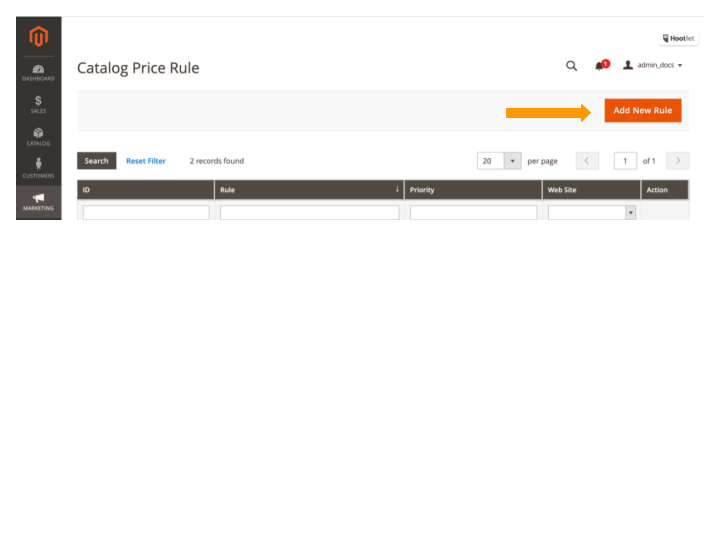
Step 1: Add New Rules
To create a new rule, click on the Add New Rule button. The first section of the panel will display Rule Information.
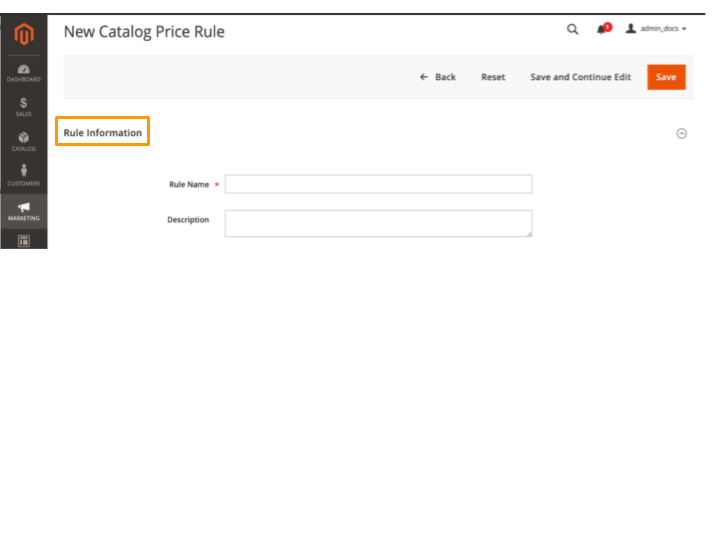
Rule Information
Once you enter this section, you can define general descriptions for your rules. Here’s where you begin setting up your discount strategy by selecting the stores and customer groups that will benefit from the discount.
In this section, you’ll also find expandable options for Conditions and Actions.
Pro Tip:
- When naming your rule and filling in the Description field, use clear content for internal reference, e.g., "20% Discount on All Shoes".
- By default, the status of your rule will be Active. You can change it to Inactive if needed.
You can apply this discount strategy to specific customer groups by selecting the Customer Groups from the list (Route: Customers > Customer Groups).
You can also set specific dates and prioritize rules (the highest priority is 1). If you leave these fields empty, the rule will be activated once the discount and price are saved.
Step 2: Setting Conditions
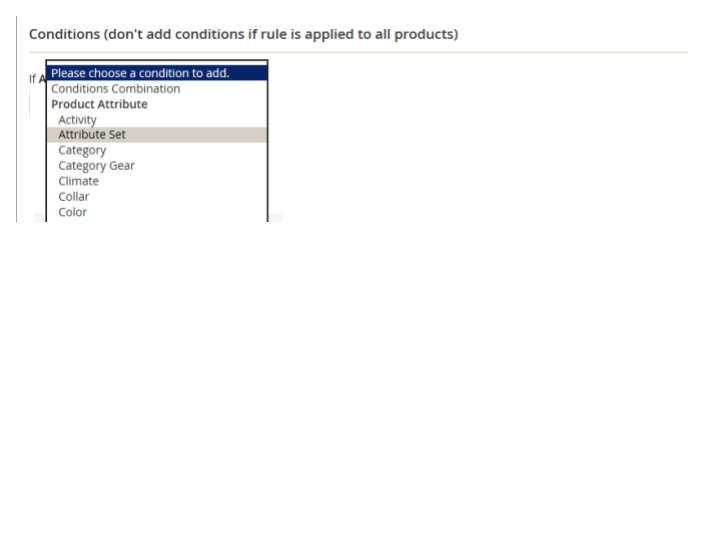
Scroll down to the Conditions section, where you can apply your discount strategy to specific products or your entire catalog.
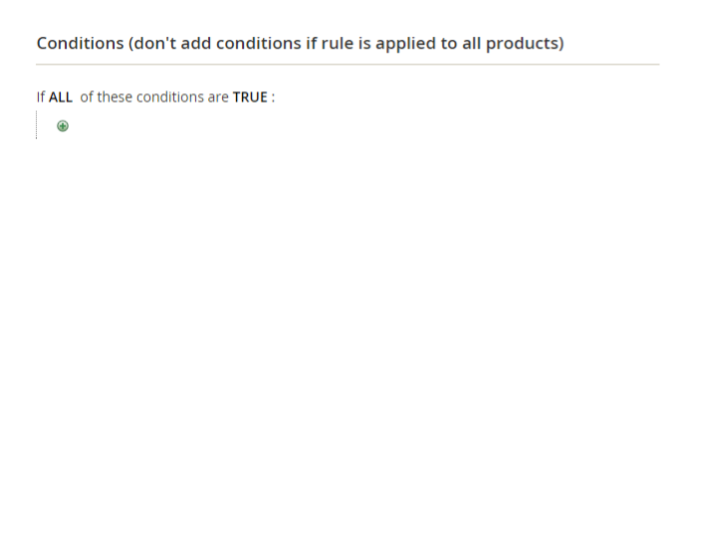
To add more conditions, click the Add button and choose from the list of available conditions. By clicking the three dots (...) icon, you can select a specific attribute. The condition settings are based on product attributes, so for any attribute to appear in the list, it must be configured for promo rule conditions.
Pro Tip:
- To apply the rule to all products, leave the options unselected.
- The default condition will display ALL and TRUE, which you can modify as needed.
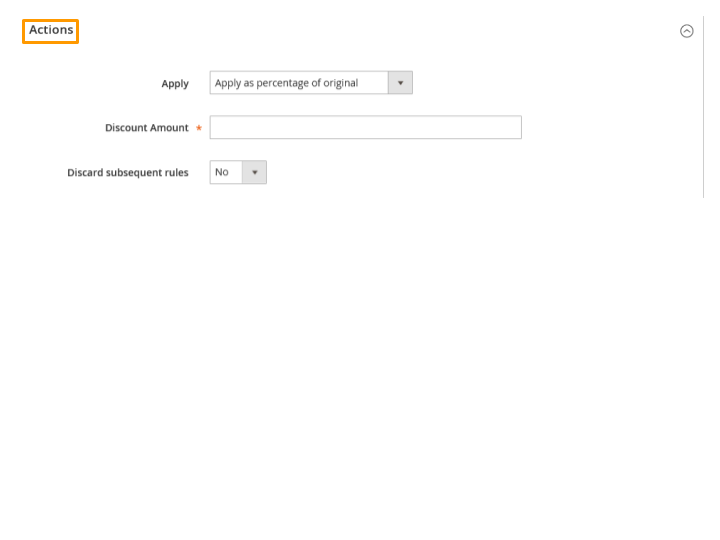
Step 3: Setting Actions
In the Actions section, you can choose the type of discount and set the pricing structure. Magento provides four types of pricing structures:
- Apply as a percentage of the original price – Subtract a percentage from the regular price.
Example: Original Price: $20, Discount: 10%, Final Price: $18. - Apply as a fixed amount – Subtract a fixed amount from the regular price.
Example: Original Price: $20, Discount: $10, Final Price: $10. - Adjust the final price by a percentage – Adjust the final price by a set percentage of the original price.
Example: Original Price: $20, Discount: 10%, Final Price: $18. - Adjust the final price to a fixed amount – Set the final price to a fixed discounted amount.
Example: Original Price: $20, Discount: $20, Final Price: $20.
The discount will apply to all products that meet the selected conditions.
Step 4: Save and Test
Once you’ve created your rule, save it and test it to ensure that it works correctly.
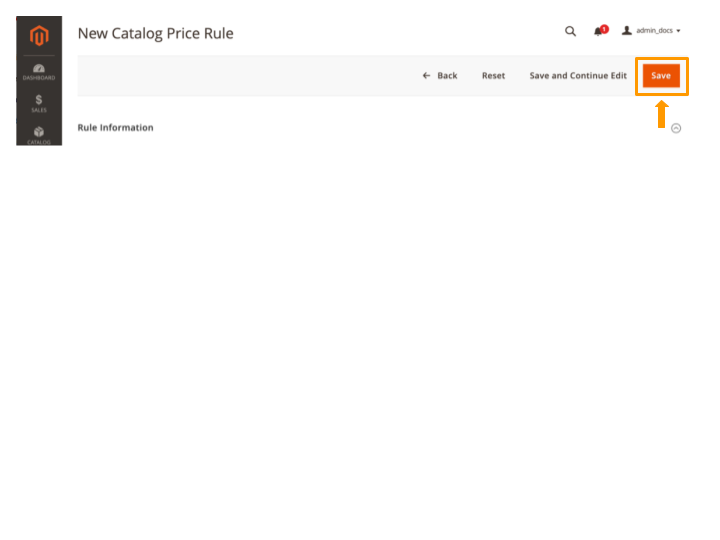
Pro Tip:
- Allow some time for the rule to be processed into the system.
- Test the rule to make sure it functions properly.
- Discounts apply to all products that meet the conditions you’ve set.
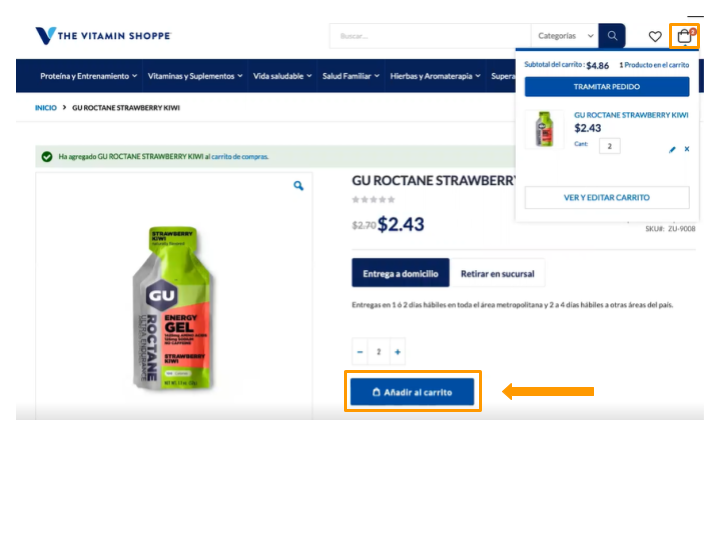
Difference Between Regular Price and Final Price
- Regular Price refers to the base product price without any discounts.
- Final Price refers to the discounted price after applying the rule in the shopping cart.

Cart Price Rules
In addition to Catalog Price Rules, you can also create and edit Cart Price Rules for discounts that apply to items in the cart. Cart Price Rules are ideal for season-based promotions or discounts using coupon codes.
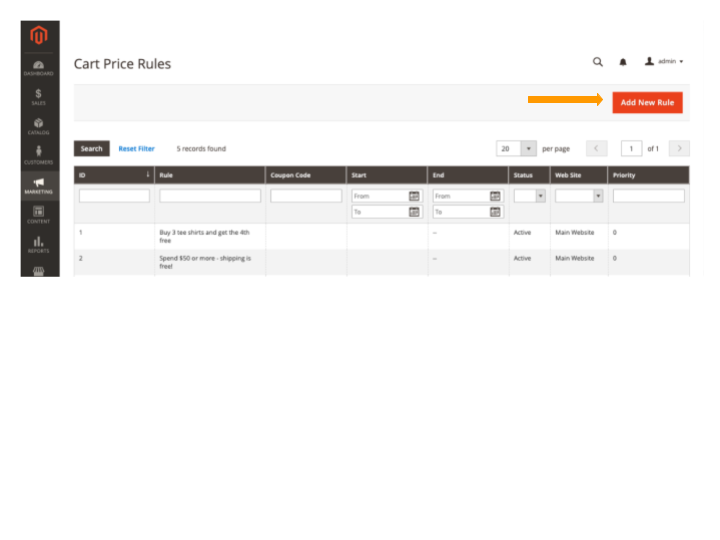
To get started, navigate to: Marketing > Promotions > Cart Price Rules.
Step 1: Add New Rule
Click on Add New Rule, and the setup process will be similar to Catalog Price Rules.
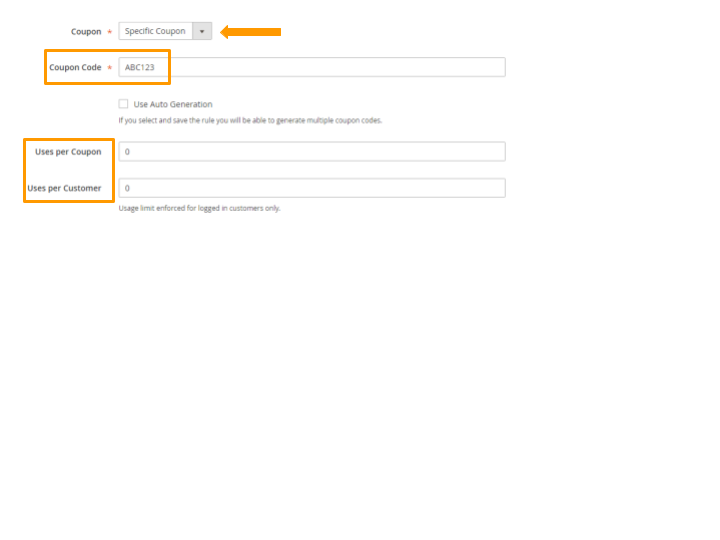
Step 2: Coupons Setup
In this section, you can create coupon codes for the discount. Select Specific Coupons and input the coupon codes you’d like to generate. You can also specify the number of uses per coupon and per customer.
Pro Tip:
- Use Auto Generation to create a batch of codes automatically.
- Set specific From and To dates to control the coupon's validity.
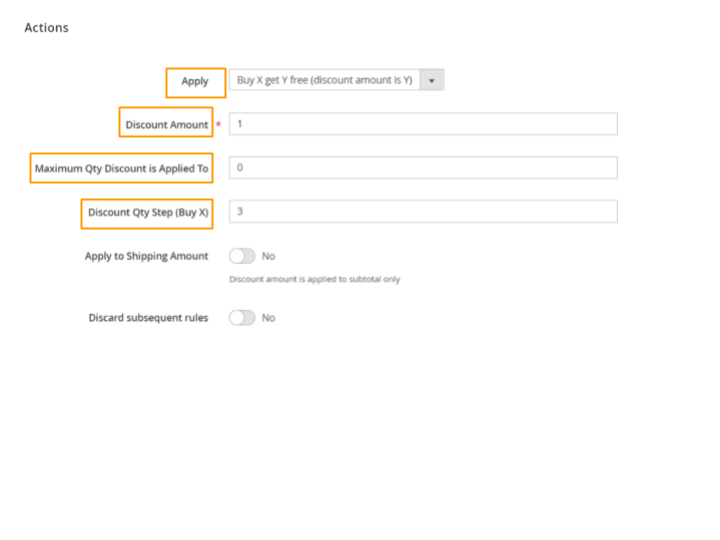
Step 3: Difference in Action Setup
In the Action section, you can set up a Buy X, Get X Free promotion. This allows customers to get a certain number of products for free when they purchase a specific quantity.
Pro Tip:
- Apply rules to the entire cart using the Conditions section or to specific products in the Actions section.
- You can also offer free shipping in the Actions section.
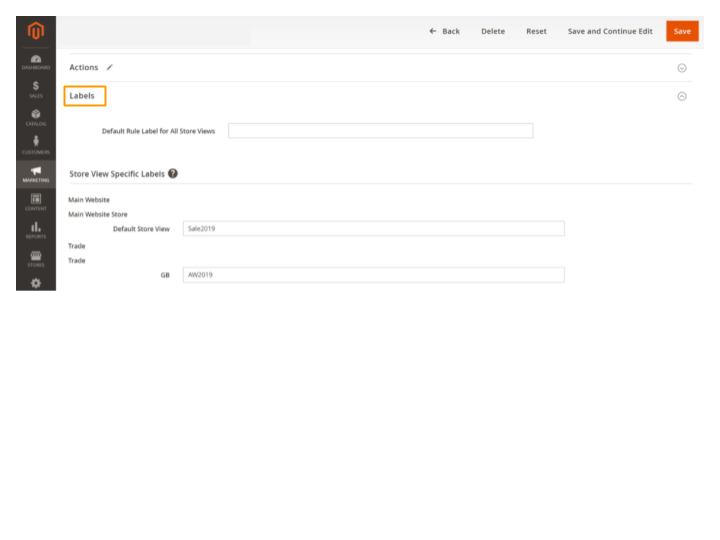
Step 4: Label Setup
In the Label section, you can specify the name of the discount that will appear in the shopping cart once a customer makes a purchase.
Pro Tip:
- You can assign a label for all stores or just for specific ones.
- After setting the label, click Save.
Conclusion
By following these steps, you can set up effective discount strategies in Magento 2, attracting more customers, boosting sales, and improving conversion rates. If you want to learn more about Magento’s setup for discount strategies, stay tuned for more Magento 101 articles!
At Rootstack, we have years of experience working with Magento and helping clients develop top-notch ecommerce solutions. Contact us today, and let’s get started!